Cannabis leaf symptoms – Diagnose your plant
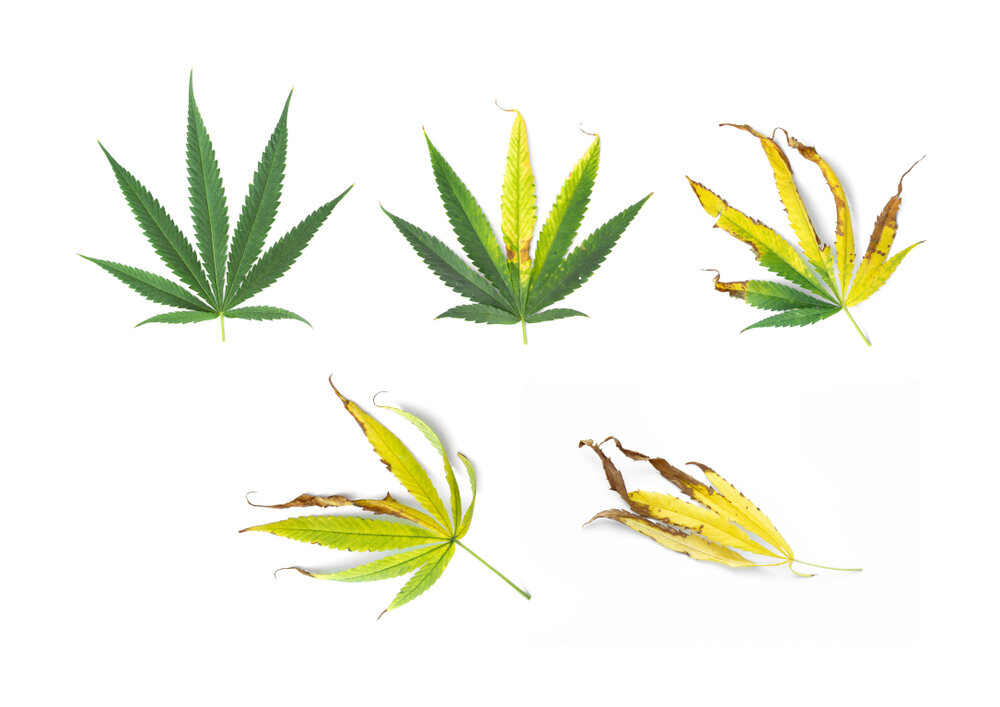
To the uninitiated, the idea of growing weed might seem like a walk in the park. Chuck the seeds in the ground, water them every so often, and three months later your flush with top-shelf bud!
But hold up, as it's not always as straightforward as it might seem.
How so?
There is a surprisingly wide range of ailments, deficiencies, and infestations that can (and most likely will, at least at some point in your cultivation journey) not only disrupt the growth of everyone's favorite plant but can even lead to crop death. The leaves on the cannabis plant are a great indicator of overall health.
Ok, so the leaves on your precious plants are showing some weird signs... What is the first step in working out exactly what the hell is going on?
There are a few ways this can be achieved, but for the vast majority of these issues, the solution starts with identifying exactly what those signs are so you can diagnose the underlying problem.
Stick around as we look at everything there is to know about cannabis fan and sugar leaves, and all the symptoms they may display if there is an issue.
What are the most common cannabis leaf problems?
So, now that we have the preamble well and truly covered, let's dive into what the exact signs are of each and every issue that can plague a cannabis crop. As this blog is focused on the leaves, we will continue down that path while adding some notes about other symptoms to look out for.
Overwatered plants
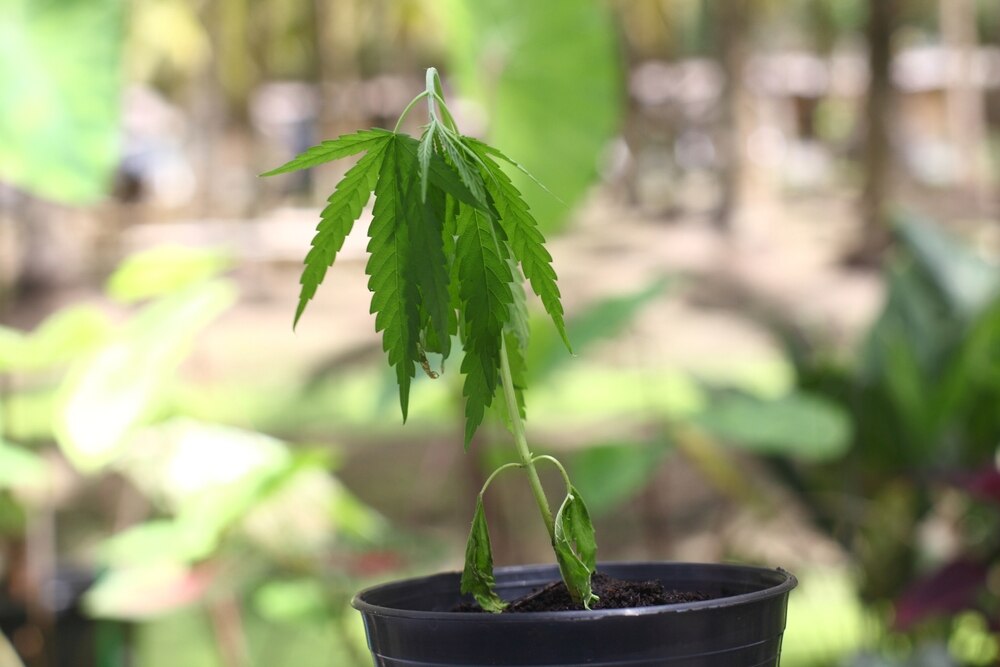
One of the main mistakes that novice growers fall into is overwatering their crops and it's obvious why this is such a common error. More water equals bigger plants, right? Nope, not at all.
Think of it more like a Goldilocks situation. Not too much water, and not too little.
Roots that have been overwatered are prone to mold issues (root rot), and pest numbers can shoot up very quickly. If the soil or substrate becomes totally saturated for long periods, then you can actually suffocate the plant.
Overwatering will result in the leaves becoming floppy (as if they are almost weighed down with the extra water), and eventually wilting and yellow if not remedied quickly enough. It's best to let the soil or coco dry out at least slightly between waterings.
It is fine to let it get bone dry every now and then during the vegetative growth period, as this forces the root ball to expand in size as it goes searching for the sweet aqua which results in better overall yield sizes.
If you see a layer of green algae forming on the top surface of the soil or coco-coir, then this is a pretty obvious sign that the plants are receiving more water than they can uptake. Scrap up the algae layer and allow the pots to fully dry out before watering again.
To learn more on watering don't forget to read our guide covering how to properly water your cannabis plants.
Underwatered Plants
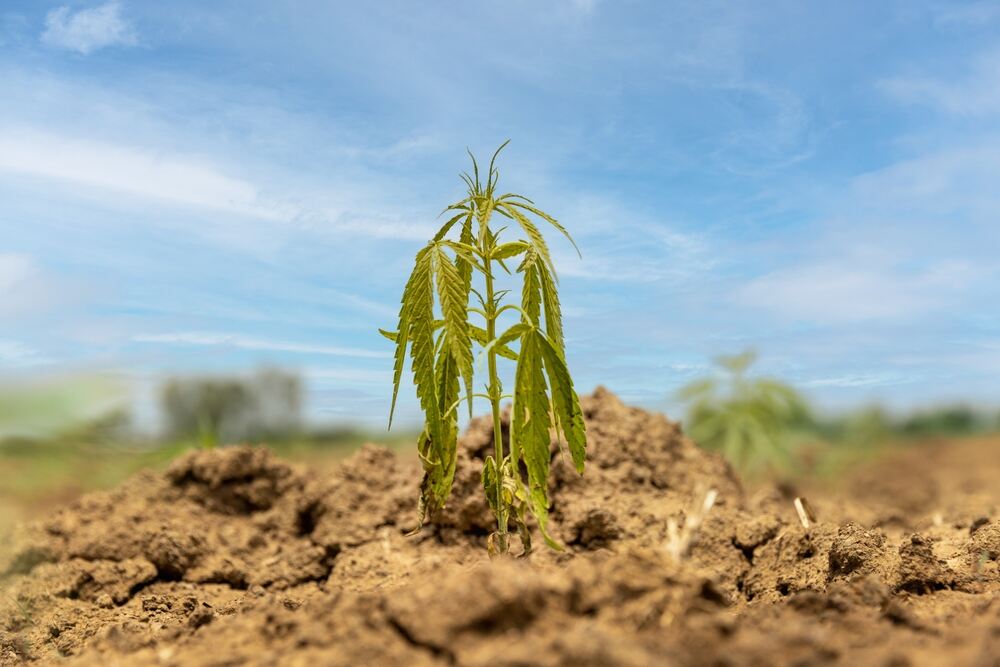
Just like overwatering, underwatering is a common newbie mistake. Ask any experienced grower and they will attest to the fact that all of us forget to water the crop from time to time. This is actually less of a problem than overwatering (to a point, the plants can’t go for more than a few days without at least a little water).
Now it can be a little tricky to tell over and underwatered plants apart for new growers, as the signs shown by the leaves can be pretty similar, especially in the first day or two. Underwatered leaves will be more brittle and dry, and also more limp. They may also become extremely thin, and even show signs of cracking.
But you should know yourself if the plants have been receiving too much or too little water. Underwatered plants are also a little more prone to nutrient deficiency issues, and the leaves can become quite brittle in some cases.
Light stress
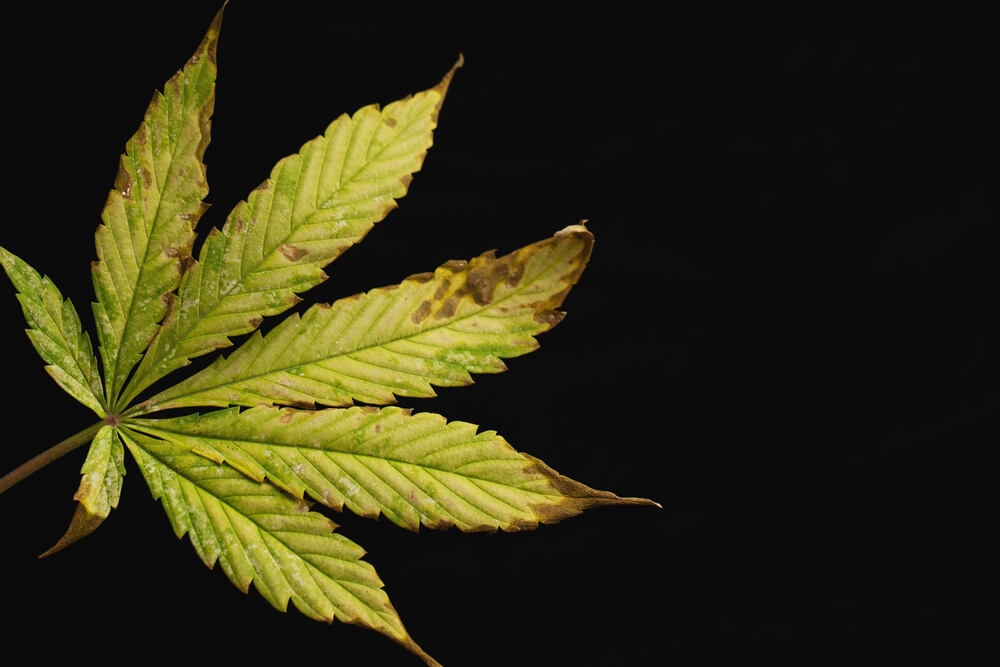
Light Stress is much more of an issue for indoor gardens over outdoor settings. It is most often caused by excessive lighting power or incorrect light height.
Overpowered lighting rigs or bulbs that are hung too close to the plants themselves can quickly cause a pretty marked negative effect. This is a commonly seen mistake but is also one of the more easily remedied issues for indoor gardeners.
Light and will cause the leaves to start yellowing, along with discolorations (rust spots) and possibly burnt leaf tips. The best way to remedy this situation is to lower your light intensity or move the lights further away from the plants themselves. It can also cause the newer fan leaves to go back to three-fingered growth.
Always check the manufacturer's recommendations for the best height to hang your lighting rig or panel, and make sure it has the correct power level for your grow area before spending that hard-earned cash of yours.
Light Leaks
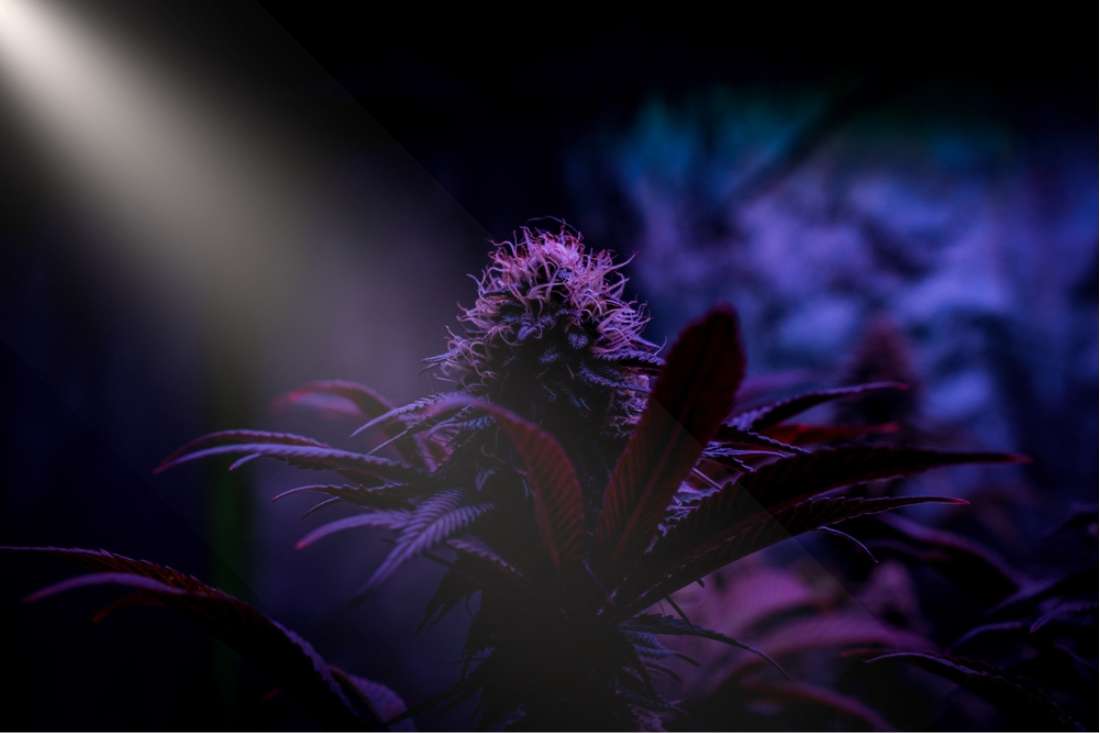
If you are growing autoflowering genetics, then this is something you simply don't have to worry about (although you should still try to plug any light leaks in your tent). But for photoperiodic strains the light timing and making sure your grow room or tent is totally dark during the lights-off cycle is a must. Outdoor growers should also try to cut out any artificial light near the crop during the night.
If you suspect are having issues with light leaks, then it's time to make sure your tent is completely sealed up. This means no gaps in the material, and a good quality reflective lining on the inside of the tent walls will help too (mylar works great), and check the zips are not letting any light through when zipped up. The best way to check this is to just jump inside the tent or grow area and switch the lights off, then see if there are any tendrils of light peeking through.
Light leaks can cause some leaf yellowing or the new leaf growth reverting back to three-leaflet growth, but the most common sign is a little more serious. If the genetics that you are growing are predisposed to hermaphroditism, then there is a good chance that light leaks will cause them to start showing male flower sites (these look like tiny bunches of green or yellow bananas growing directly out of the buds).
Environmental or Climatic Stress
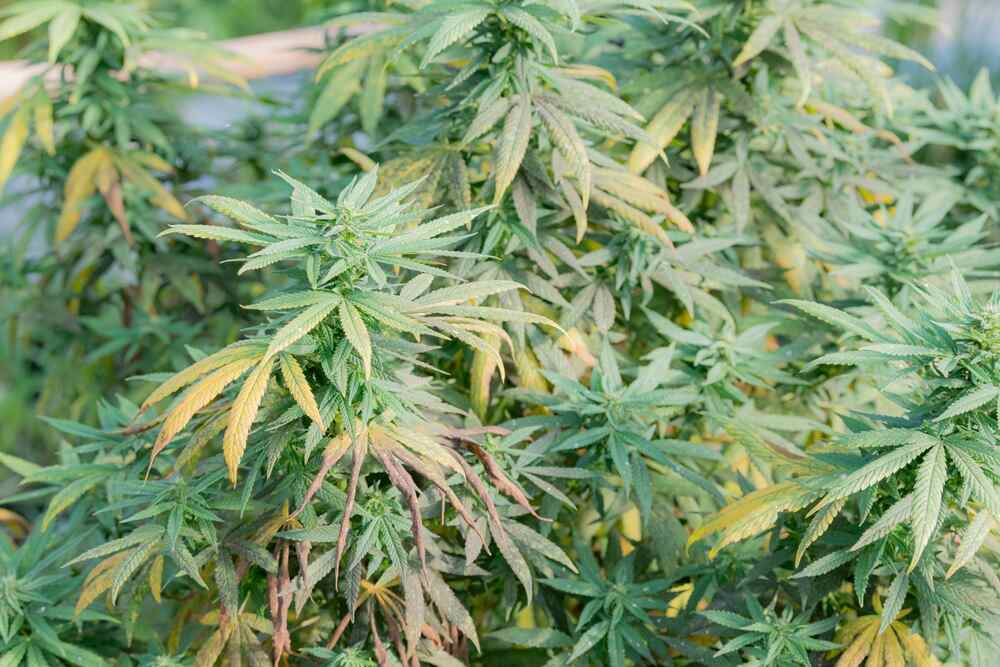
Weed can be a bit of a fickle beast, especially when it comes to the climatic conditions it prefers. While it will make it through the entire lifecycle in a wide range of temperatures and humidity levels, for optimal growth and overall plant health, and for the best chance at huge yields, it's best to keep these levels firmly under control.
In terms of both the temperature and relative humidity, the range depends on how old the plants are.
- For plants that have just broken ground and are in the seedling stage, you want a temp range of 75 to 80 F (that's around 24 to 27 C) with the humidity sitting at around 65 to 70 percent.
- Once the vegetative stage begins, you can drop the humidity down to 50 to 55 percent, with temps of 70 to 75 F (22 to 24 C).
- When the flowers start to properly form, the humidity can be slowly lowered to closer to 45%, with temps staying the same.
Of course, these ranges are very specific and so it's fine if you are slightly out but if temperatures are far over these parameters then it is likely that your plants will begin to suffer from heat stress.
In terms of signs of environmental stress that the leave may show, again, you are looking at yellowing or discoloration (rust spots). These can be caused by either too low or too high levels of temperature and humidity. Also, watch out for the fan leaves curling up like a taco shell or even drooping excessively.
Outdoor growers are much more at the mercy of the gods, but if the crop has been grown outdoors from the beginning the plants are usually better at handling climatic swings.
Cannabis Nutrient Deficiencies
Nutrient deficiencies, or nutrient lockout, can be caused by a huge range of issues. From underfeeding to incorrect pH levels in the nutrient solution or root zone, and even too heavy of a feed, the issue is hard to condense down to one small section here.
Most nutrient deficiencies will cause the leaves to display some yellowing, along with other signs like crispy or wilting leaves. If you suspect that the problem may be deficiency based, it's best to look over specific articles on each nutrient deficiency and go from there.
Over Feeding
Again, a customary novice cultivator mistake. More fertilizer equals bigger plants, right?
Wrong!
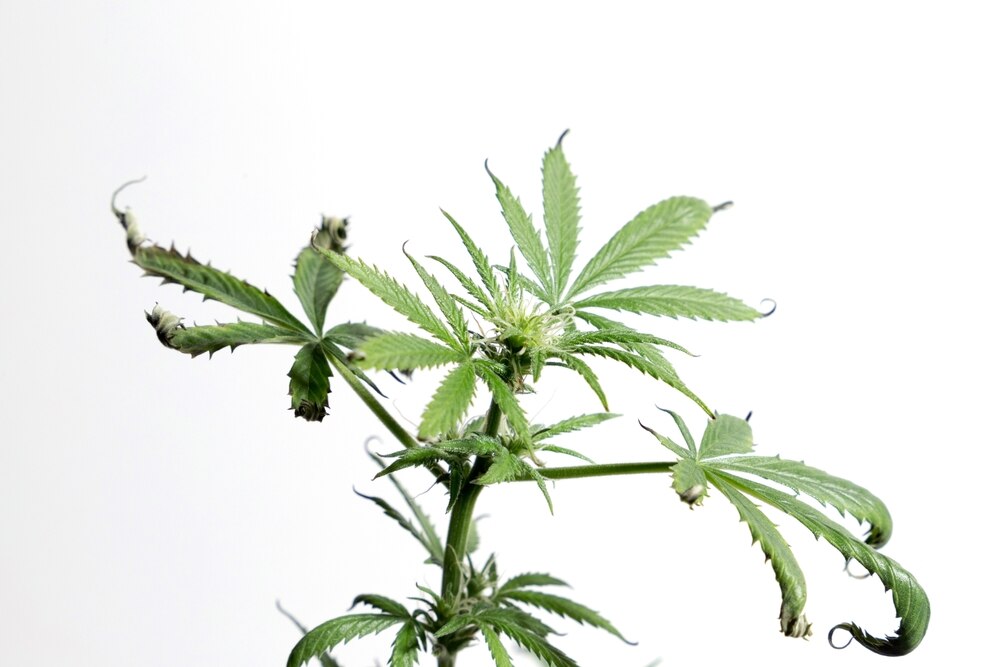
Goldilocks is back at it here, with the goal being to find that just right balance of nutrients. Too much and you will get what is known as nutrient burn, or nutrient toxicity. This usually presents itself as yellowing or even burning on the leaf tips. If it is allowed to continue, then the entire leaf structure can start to fully yellow.
Less of an issue for organic soil crops, especially if you are using your own soil blend or a specific cannabis soil but be wary of cheap potting mixes. These most often come with heavy doses of nutrients which can be overwhelming for young weed plants. If you are using synthetic bottle or pellet nutrients then it's best to start with around a quarter of the suggested doses, and slowly work your way up.
Some of the common signs of overfeeding include leaf tips that have curls inwards and/or are yellow or brown (tip burn). This is usually accompanied by the leaves turning a heavily oversaturated green color.
If you do suspect that overfeeding is the issue, simply flush the substrate with clean, pH-regulated water and start again.
pH Issues
The regulation of the pH at the root zone, and of the water or nutrient solution that you are providing to the crop is extremely important - especially for coco-coir or pure hydroponically grown crops.
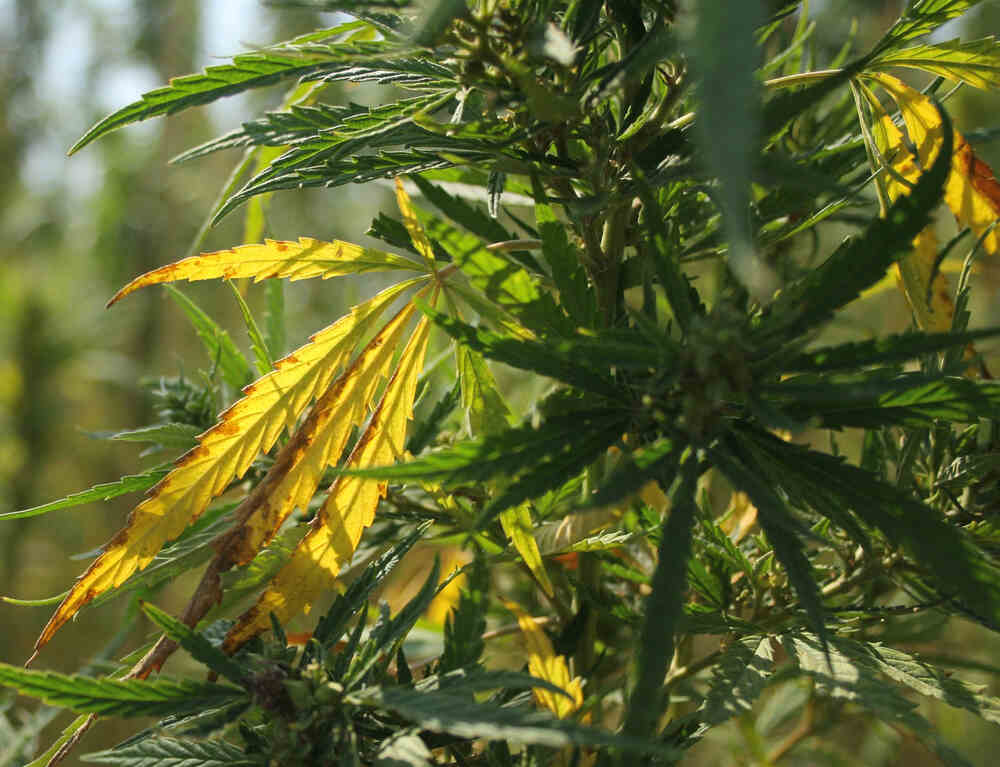
Nutrients can only be up taken up by the plants within a specific pH range (5.5 to 6.5 for coco and hydro, or 6.0 to 7.0 for soil). problems with pH levels can lead to a wide range of leaf signs, as it can be the cause of a bunch of side issues such as a nutrient lockout or root rot.
The more commonly seen leaf symptoms include bronze, tan, brown and yellow speckling on the middle to lower leaf growth.
If you think pH might be an issue, flush the roots with a decent amount of fresh water at the correct pH level for your style of cultivation. Check the runoff from the pots and see if it is within the correct range. If not, flush again until it is.
Root Rot
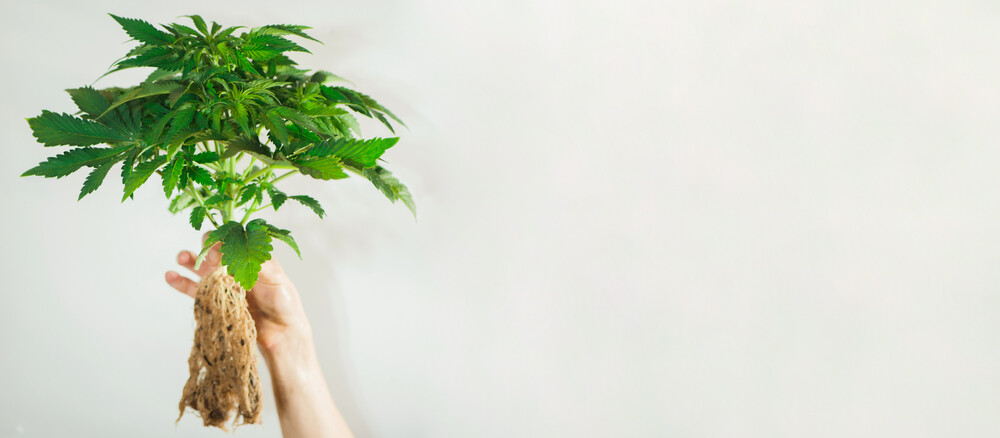
One of the trickier issues to diagnose, as unless you are growing hydroponically and have easy access to the roots, then it's all about understanding the signs from those leaf tips. The leaves themselves will often turn yellowy brown when the roots are rotting, but this can take a while to happen (to where the plant may be past the point of saving).
Root rot is caused by pathogens that hang out in waterlogged soils, or contaminated nutrient solutions, and attack the roots causing them to rot away.
If you suspect root rot is occurring, then let the substrate dry out completely and try to have a careful dig down to see if there are any brown or sludgy roots present. You can try and get the plant out of the current media, carefully wash the roots off, and replant it in fresh soil or coco. To prevent root rot from taking place in the first place, be careful not to overwater and use pots with sufficient drainage.
Wind Burn
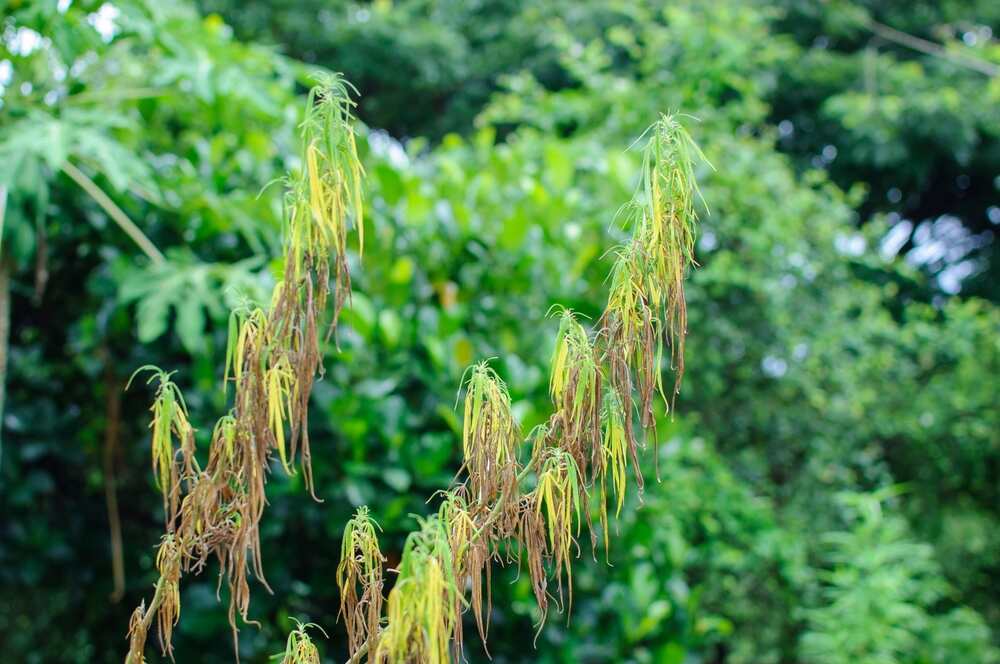
Much more commonly seen on outdoor crops in wildly windy areas than indoors, but also (usually) easily dealt with. The leaves will usually start to dry out and may also start to curl inwards and upwards (similar to heat stress), or wilt excessively.
To combat the issue, plant some large companion plants that can help cut down the number of windy gusts that can hit the crop, or set up some kind of windbreak. Indoor crops need to have some distance between the plants and the crops.
Verticillium
A particularly nasty strain of mold on cannabis that attacks the roots and almost always results in crop death. Like lesser aggressive forms of root rot, the leaves will only start to properly yellow once the issues have really taken hold but will also cause heavy leaf wilting and even overall plant drooping.
There's no fix for this one. It's best to cut your losses and start afresh crop in a fully sterilized environment.
Cold Damage or Stress
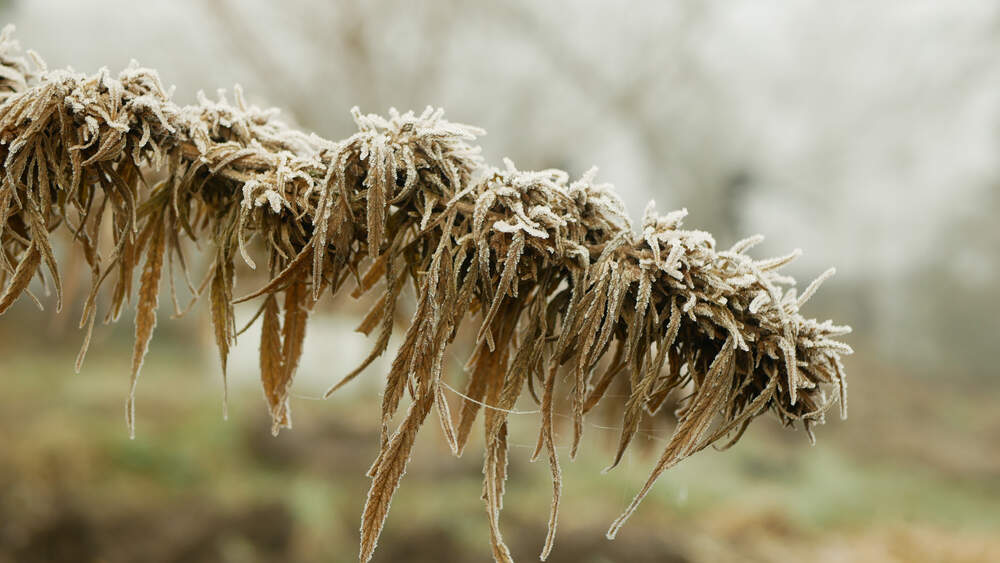
This one is obviously more of an issue for those growing cannabis in cold weather regions, as heating indoor cannabis grow spaces is pretty easily solved. Cannabis plants are not fond of cold temperatures and will start to show signs of distress when the temps drop below 15 C (around 60 F) for long periods.
Growth will not only slow right down, but the leaves will curl up, yellow, and begin displaying white patches along the outer edges.
If you are planning an outdoor grow in a colder-than-ideal location, it's best to stick with strains that are known to deal with colder temps. You can also look into building a cheap and easy DIY greenhouse, and even add a small heater to the area if need be.
Leaves Displaying Strange Colors
While we almost always associate cannabis with a vibrant and punchy green hue, the leaves (and buds) can actually offer up a rainbow of colorations. Most of these variations are nothing to worry about, but certain issues do come with some odd colors on the leaves.
The most commonly seen leaf symptom is yellow and brown speckling on old growth, while blueish hues or extremely dark green can be a sign of low nitrogen levels. If you think a problem might be present, then start by checking your nutrient strengths and pH levels first before adding anything extra to the mix.
If the stems of the leaves turn a bright red all of a sudden, this could be a sign of a couple of things. In terms of nutrient issues, there's a good chance that the plant is lacking phosphorus, calcium, or magnesium if the leaves are also yellowing. The light intensity may be a little too high also.
If there is an appearance of almost baking flour like dusting on fan leaves, then powdery mildew is probably the problem.
If you are seeing some very strange mosaic-style markings appear it could be...
Tobacco Mosaic Virus (TMV)
Tobacco Mosaic Virus (TMV) is a real son of a gun. It can be passed on from other plants and is more among outdoor cannabis plants than indoor crops.
The virus usually presents as some kind of mottled, speckled lightening of the foliage. It can also cause the leaves to start curling and will often result in stunted growth and a weakened plant that is more prone to infestations and molding.
Unfortunately, there is no cure for TMV. The best thing to do here is cut your losses and switch out the infected plants - or if the affected plants are nearing the end of the lifecycle, you could just wait it out, up to you.
Common cannabis pests
Leaf Miners
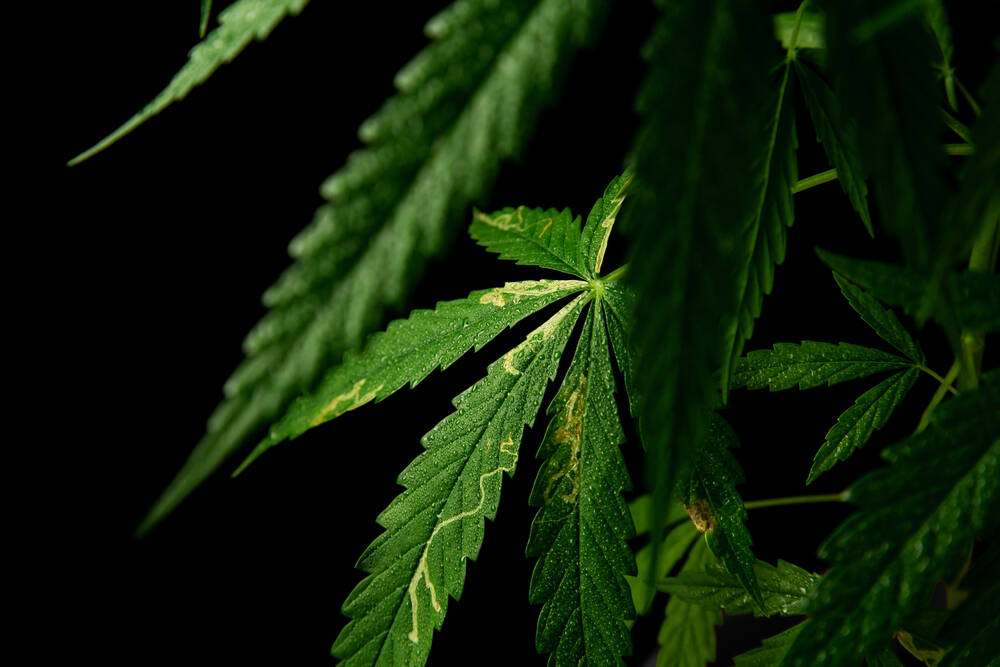
Leaf miners are one of the less serious pests often seen in outdoor crops and are easily identified by the track marks running throughout fan leaves. Simply hit the leaves with a neem oil spray for a few days and the issue should dissipate, but sticky traps can also be a great preventative measure.
Aphids
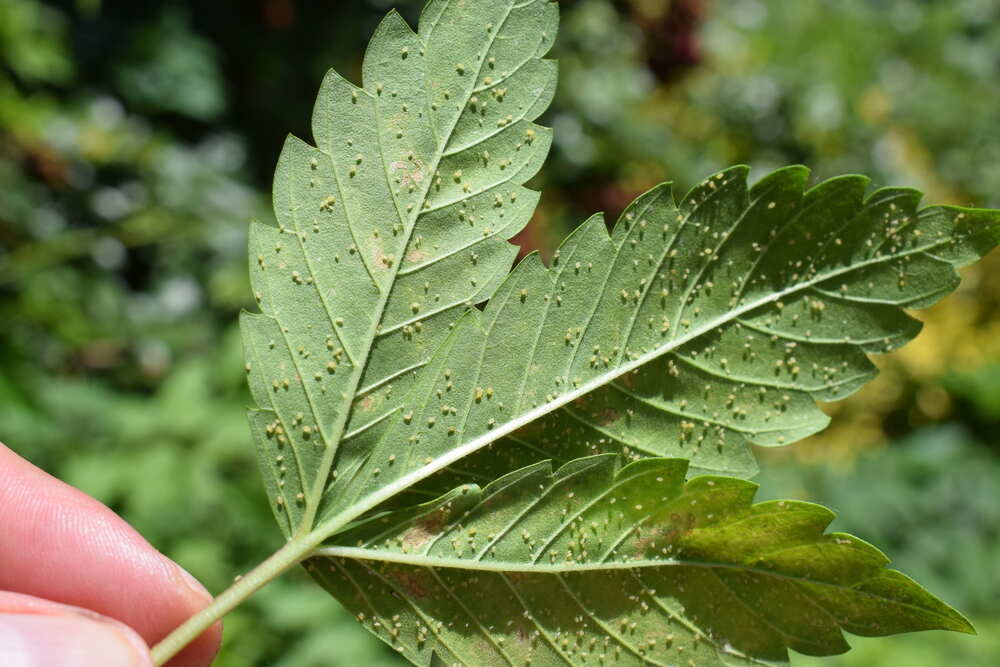
These minuscule little annoyances suck the sap directly out of the leaf stems and can quickly cause a devastating amount of damage. The most common sign is the presence of yellow and white patches or more overall speckling. As they are so tiny, you may need a USB microscope or jeweler's loupe to really see what's going on.
The best way to rid your crop is to spray with a mixture of neem oil spray with a few drops of insecticidal soap, and to sprinkle a generous dusting of diatomaceous earth (food grade) around the base of the plants. Ladybugs are also a great line of defense.
Thrips
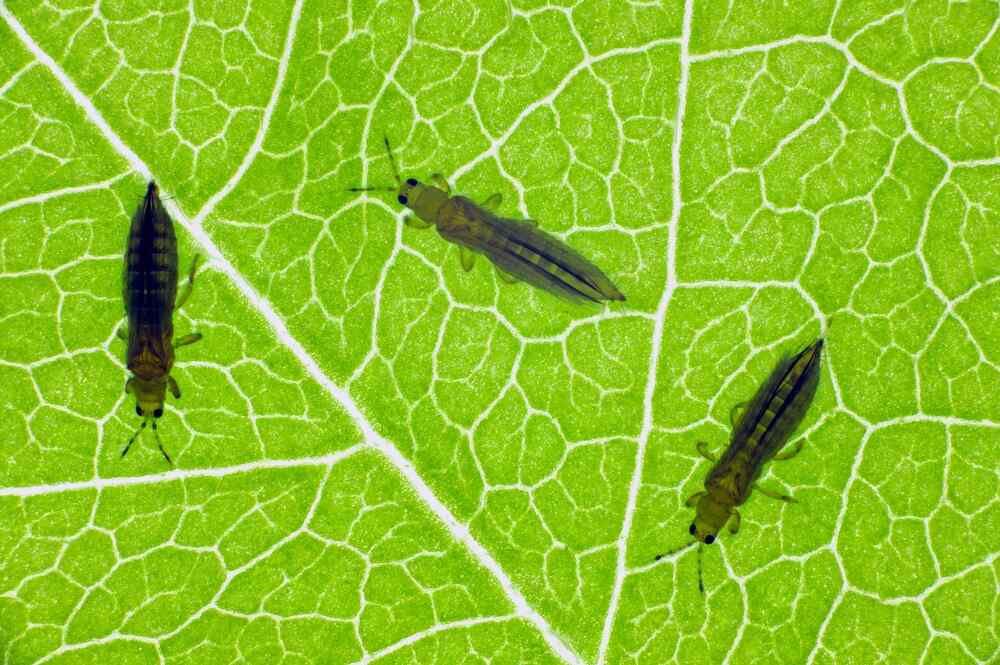
Thrips are another common pest that you may find on cannabis crops, and they attack the leaves with reckless abandon. The leaves will begin to show patches of silver/white spots, sometimes accompanied by a slimy sheen.
Again, a neem oil solution in a spray bottle is the best removal method.
Caterpillars
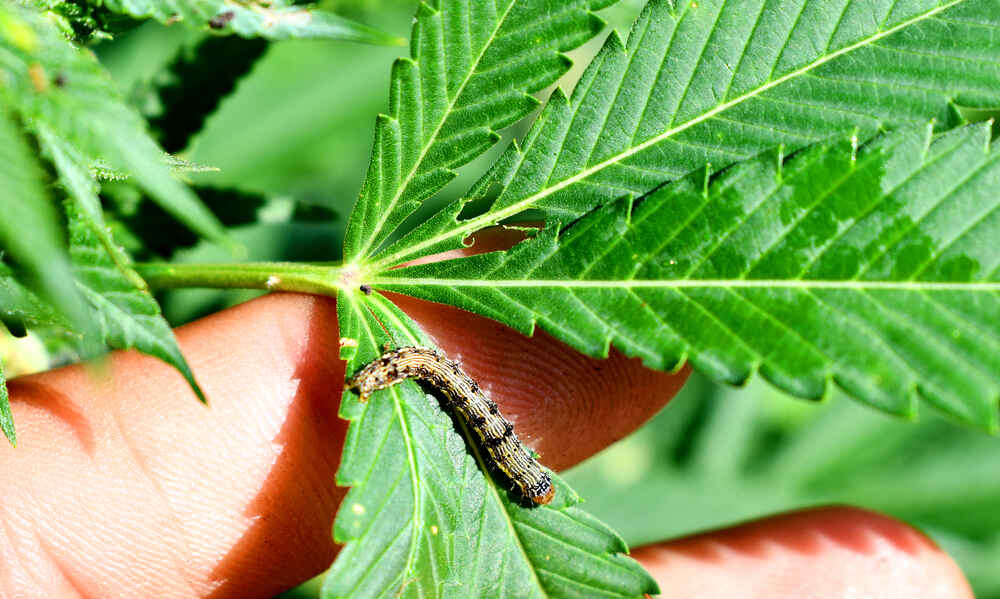
Caterpillars come in all shapes and sizes, but one thing they all have in common is their love of juicy, plump fan leaves. They can quickly run through a plant leaving behind a trail of destruction that usually comprises of full chunks taken out of the leaves, and sometimes a trail of dirt in their wake.
The best way to get rid of them is to physically pick them off whenever you see them and to hit the plant with an organic, store-bought caterpillar spray that uses bacillus thuringiensis (BT) bacteria as the active ingredient.
Spider Mites
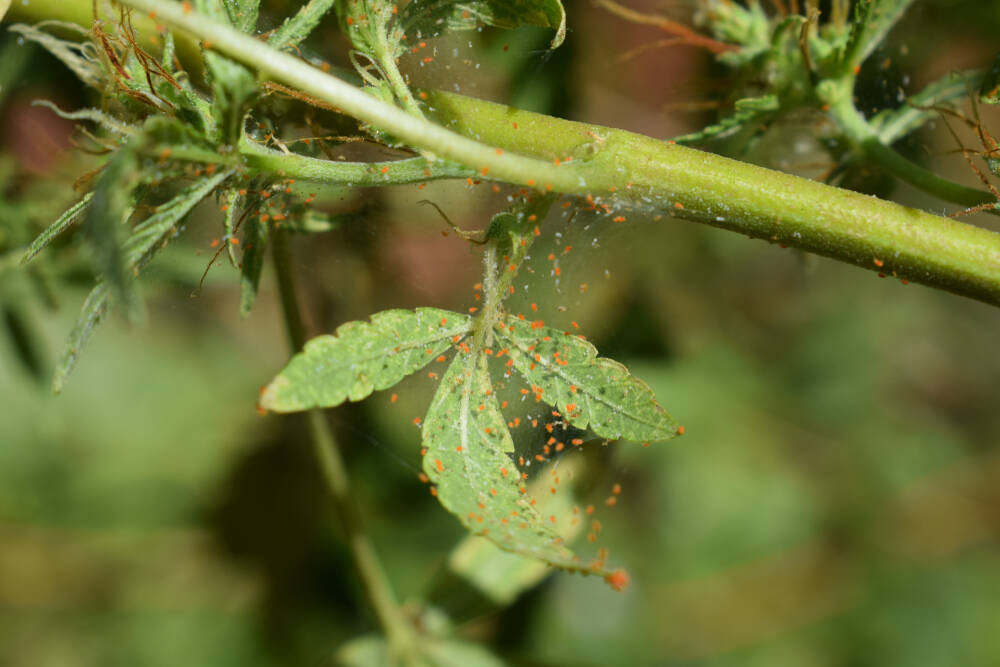
Spider mites are pretty nasty little annoyances, and one of the more serious pest infestations for cannabis crops. They multiply faster than rabbits, have a ravenous hunger, and have heavy resistance to many pesticides.
Spider Mites are absolutely minuscule, with all but the fully grown adults being invisible to the naked eye unless you are really looking closely. They can come in shades of red or brown/black in adult form, or a pale translucent green as youngsters.
The damage that they reap usually comes in the form of yellowish white to tan spots on the leaves, with an overall bronzing for leaves that have really been hit hard. If you see some very faint webbing that can cover not only the leaves but also the buds, then there's a good chance it's spider mites you are dealing with.
Fungus Gnats
Fungus gnats closely resemble tiny little houseflies and will buzz around the top cola of the plant. Adults are not actually such a big issue, it's the larvae you will need to look out for. They live in the soil and attack the roots, severely diminishing the plant's health and ultimately stunting its growth.
If you notice the plants taking on a wilted appearance, or some leaf yellowing, drooping, and spots - and there is no obvious nutrient deficiency issues and you have been watering correctly then you are probably dealing with Fungus Gnats.
For the larvae, diatomaceous earth sprinkled liberally over the topsoil should do the trick, and just place a few sticky traps out to deal with the adults. You will also want to let the substrate dry right out for a day or two and make sure you are not overwatering.
Now, to deal with them…
As they are highly resistant to pesticides, you are first going to want to hit the plant with a high-powered hose (only for well-developed, robust, and vibrant plants though). Try to wash away as many as possible and keep a good eye on the underside of the leaves where the eggs are laid. Then try to cool the growing area right down for a day or two and increase airflow. Spider mites hate wind and cold.
Then it's time for the big guns. Products like Doktor Doom Spider Mite Knockout Spray, Floramite, or even a solution of 9 parts water to 1 part alcohol may make a big difference.
What Color Should Healthy Cannabis Leaves Be?
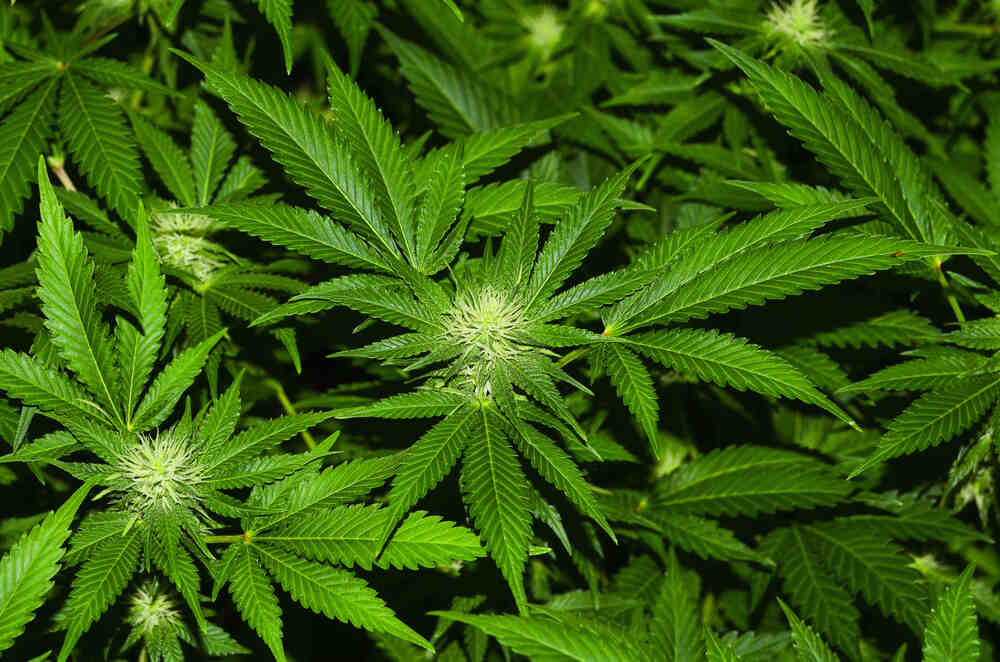
As we mentioned a bit further up, that really depends on the strain you are growing. Indica dominant strains will usually (but not always) be a darker shade of green than Sativa heavy cultivars, but that is anything but a blanket statement.
What you are looking for is vibrancy, with nothing too light or pale. A medium to dark shade of green is perfect, but there is one other factor that is just as or even more important than the particular shade of green... Consistency. Plants with a uniform, consistent color throughout most of the plant structure (new growth is always a slightly lighter shade than the old stuff) are exactly what you want to see.
Purple fan leaf growth is nothing to be alarmed over and has no effect on the maturing buds whatsoever. It is pretty much only certain strains that will exhibit this trait, but there's no need to worry if you see any purple patches - especially if your nighttime or lights of temps are dropping down to around 60 F (15 C). The bottom line here is that if what you are seeing looks healthy, then most likely it is.
Is Leaf Color an Indication of Potency?
No, you can't tell how powerful the THC punch contained within buds may actually be until you either light it up or send it off to the lab for analysis. But a recent study did show a correlation between fan leaf shape and color, and whether the plant contains higher levels of CBD, THC, or a combo of both.
By far the easiest and most effective way to check potency of a cannabis plant is to asses the trichomes once the plant is close to harvest. Although this wont tell you how much THC a plant contains, it will tell you when to harvest for optimum potency.
The study showed that most cultivars with higher THC percentages tended to have fatter, shorter leaflets. Strains with a heavier CBD percentage usually presented with the more classic Sativa-shaped leaf growth, and those with a more even balanced split of both THC and CBD had leaf growth with medium-width fingers.
Can Cannabis Absorb Nutrients Through Leaves?
When discussing plant nutrition, we most often just stick to talking about providing the roots with an interrupted supply of all the macro and micronutrients that they need for the particular stage of growth. As the plants develop and grow, the levels of specific nutrients that are needed to ensure the crop stays at peak health, and produces the largest possible yield size, changes.
Sure, you can always just tailor the root nutrient solution to the particular stage of growth, but what you may not know is that it's actually possible for the plants to absorb nutrients directly through the leaf growth. This is referred to as foliar feeding and is not just great for boosting certain nutrients for feeding purposes, but also a handy tool to have in the back pocket if any nutrient deficiency issues pop up.
This is even more true if the nutrient deficiency that you are battling is an immobile nutrient, as foliar feeding allows you to completely bypass any issues relating to the plant being unable to transport the nutrient to the correct area of the plant, or with the roots not being able to take up the particular nutrient.
For foliar feeding, you will want a nutrient solution that is at about half the strength of the one you would use for root feeding. This is due to the fact that the leaves will be able to absorb much higher levels of nutrients than the roots can, and feeding an overly strong solution can cause burn marks on your fan leaves and even lead to nutrient toxicity.
Foliar spraying is also used for the application of insecticides and pesticides. There is a huge range of both organic and synthetic options available, but for home growers, we usually recommend starting out with a low-impact, organic option before reaching for the harder stuff. All home cultivators should have a bottle of Neem oil at hand - this product is effective against most of the pesky little bu**ers that love cannabis. Check out our post right here for more info.
What Do Male Cannabis Leaves Look Like?
There are a few ways to identify male plants, but the leaf structure isn't one of them. Male and female cannabis leaves look almost identical, and it is only when a male plant reaches the flowering period and produces pollen sacs that it can be definitively identified as such.
The Wrap Up
Phew, what a doozy of an article, yeah?
If you have made it all the way to the end, congrats. Over 4000 words on cannabis leaves and the signs they can show to help you understand the intricacies of issues that can hit cannabis plants.
The process of diagnosing these issues can be confusing, annoying, and even overwhelming for new growers... So, if you do find that your crop is affected by pests, disease or discoloration, don't despair.
Use the information in this article to your advantage. Think of it as a starting point for further research. There is just so much info available online these days, with extremely specific information that will help you diagnose and fix the issue quickly so that your crop is back on track before long. Check out our entire blog space for all your info needs, and hey - good luck and enjoy the ride!
If you want to learn more about cannabis leaves and their appearance, don't forget to check out our article on 'what we can learn from the appearance of weed leaves' that covers everything from their purpose, types of leaves and number of leaflets and what this means to us growers.
-
20+ Years Experience
Over 500K seeds sold worldwide
100K+ Happy Customers -
Germination Guaranteed
Complete satisfaction or we will replace your order -
Dutch and USA Genetics
Master breeders inspiring strains from across the world -
Express Shipping
Free tracked express shipping 1-5 day delivery


